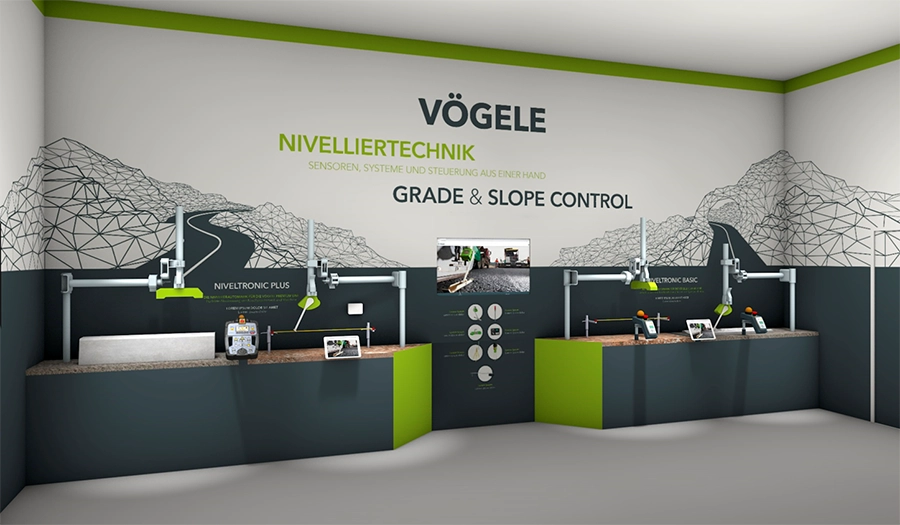
AUTOMATIC GRADE AND SLOPE CONTROL WITH NIVELTRONIC - PART 2
In the introductory article about Niveltronic Part 1, we presented an overview of the automatic grade and slope control system, the various components, and the functions of the sensors included in the Niveltronic system. In this Part 2, you will learn more about the operation, settings, and parameters of Vogele's Niveltronic Basic and Niveltronic Plus systems for automatic grade and slope control.

You can review Niveltronic Part 1 HERE for an overview of the automatic grade and slope control system, the different components, and the functions of the sensors included in the Niveltronic system.
INTRODUCTION TO SETTINGS AND PARAMETERS
Below is a detailed comparison between Niveltronic Basic and Niveltronic Plus.
HARDWARE AND DISPLAY
 |
 |
| Display and F1 - F5 keys | Keys for left or right side of screed |
 |
 |
| (1) Navigation cluster | Display |
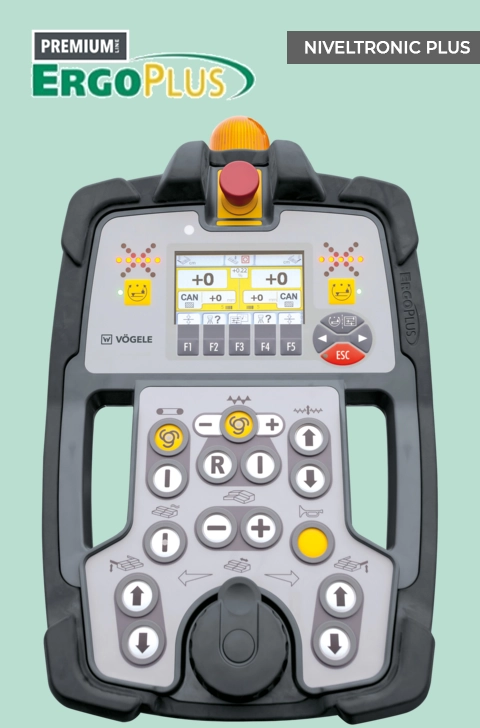
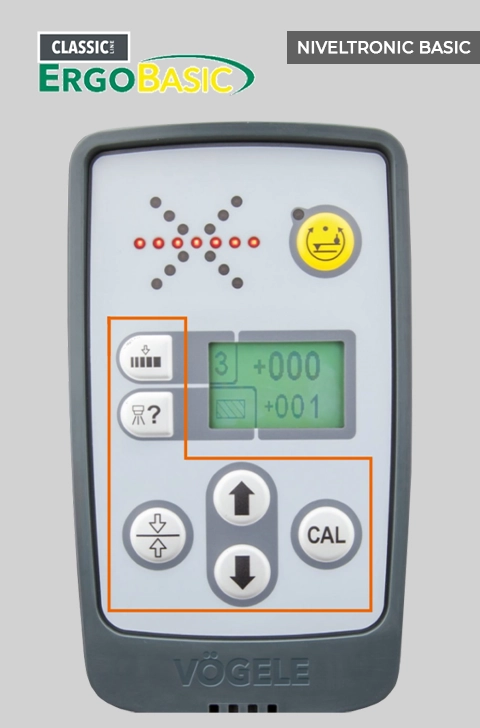
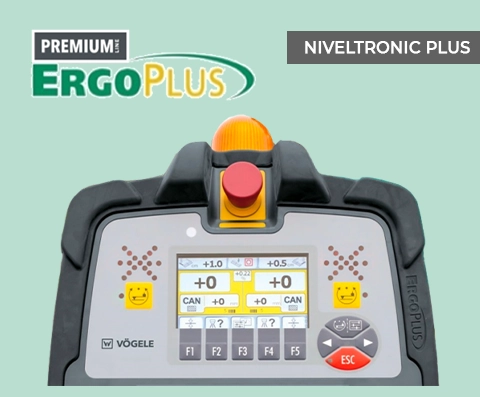
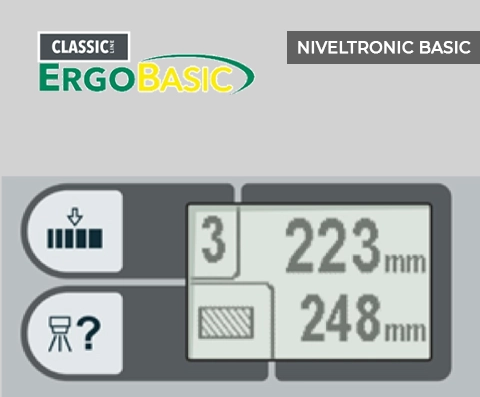
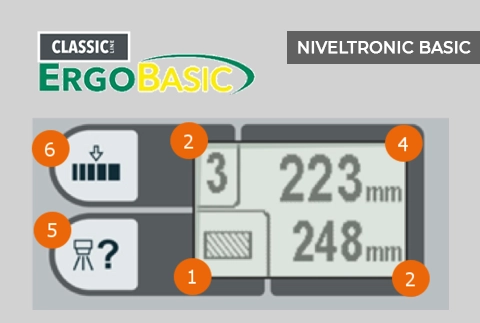
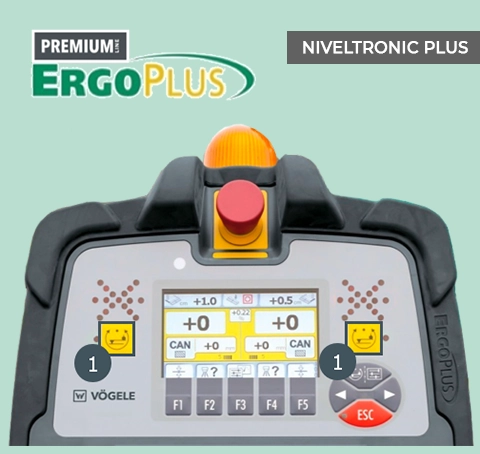
FEATURES OF ERGOPLUS AND ERGOBASIC
 |
 |
| Display and Keys | |
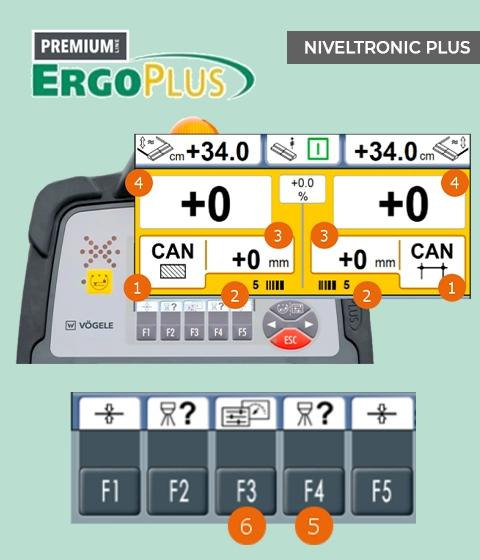 |
Keys 1. Display: Sensor type 2. Display: Sensitivity 3. Display: Actual value 4. Display: Set value 5. Selection: Sensor type 6. Selection: Sensitivity |
| Equipped with more keys, offering more setting options: unlike Niveltronic Basic, the operator can control both sides of the screed from one side with Niveltronic Plus. | |
 |
|
| Symbols |
||
| Measuring Device | Display on Niveltronic Plus | Display on Niveltronic Basic |
 |
 |
 |
| When referencing the height on both sides of the screed, the display also shows the screed's slope. | ||
 |
 |
 |
 |
 |
 |
| No slope ±0% | Slope to the left -1% (example) | Slope to the right +1% (example) |
 |
 |
 |
 |
 |
 |
 |
 |
 |
 |
 |
 |
 |
 |
 |
 |
 |
|
Function keys: For making settings and changes as well as accessing submenus for both sides of the screed. Convenient display: For monitoring and operating both sides of the screed. Help display: Top row - Position of the screed raising/lowering cylinders (left and right) - Screed Assist ON/OFF symbol - Float position ON/OFF symbol (left and right) Cross LEDs: Monitoring of grade and slope control on both sides of the screed. |
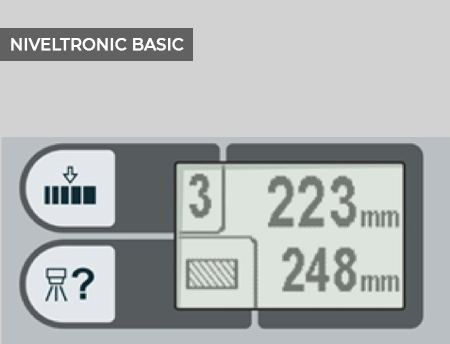
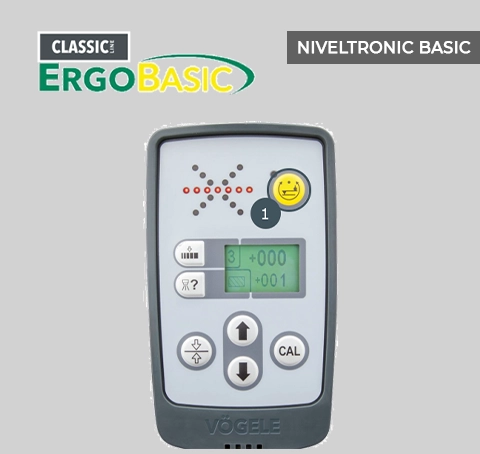
Cross LEDs: Monitoring of grade and slope control on both sides of the screed. Keys: The screed remote control unit only has keys for the settings required for each connected side (sensitivity, sensor selection, quick set, adjustment of special values, calibration). Function of the keys: - When automatic grade and slope control is switched on: Adjustment of the specified value, but only for the corresponding side of the screed. - When automatic grade and slope control is switched off: No function. Display - minimized: Sensitivity (e.g., number 3), ground mode, default value, actual value. |
 |
|
|
When automatic grade and slope control is switched ON: Setting of special values. When automatic grade and slope control is switched OFF: Manual positioning of the screed raising/lowering cylinders on both sides, which can be monitored from the paver operator's platform. |
AUTOMATIC GRADE AND SLOPE CONTROL
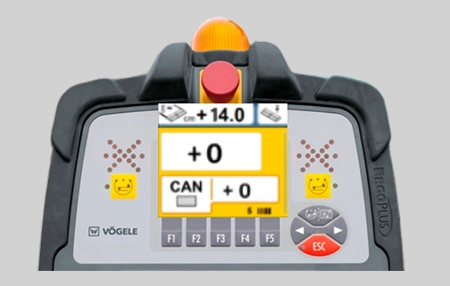
Operator Presets Available in both Niveltronic Basic and Niveltronic Plus
|
|
| Quick Set | |
| Quick Set keys | |
 |
 |
| With the quick set key F1 for the left side of the screed, the operator defines the displayed values as preset values. | With the quick set key F5 for the right side of the screed, the operator defines the displayed values as preset values. |
 |
 |
 |
 |
| Height referencing with sonic sensors in Ground Mode | Slope sensor |
| Sensor selection | |
| Sensor selection keys | |
 |
 |
 |
|
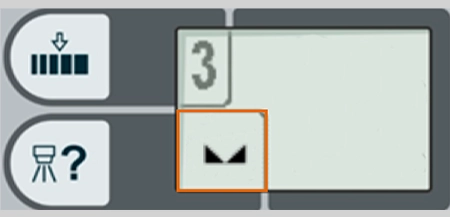
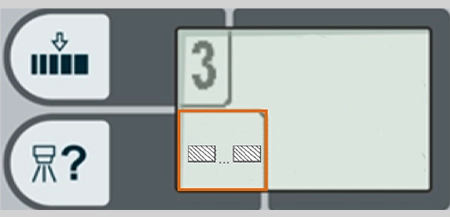
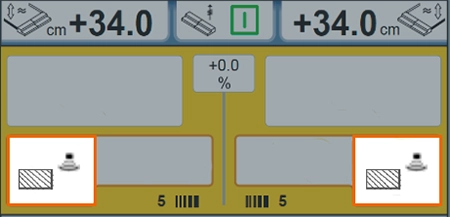
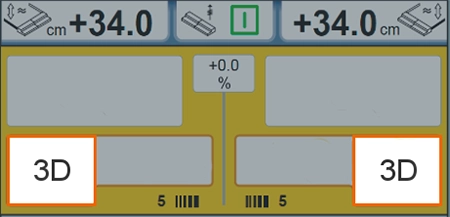
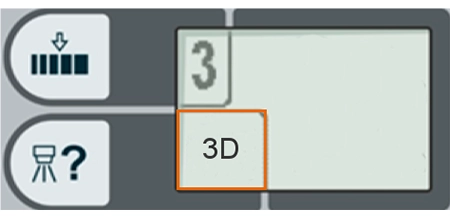
| With the function keys F2 for the left side of the screed and F4 for the right side, the operator can select between the connected sensors (maximum of 3) and choose Ground Mode or Stringline Mode for referencing. | |
 |
 |
|
Example: 1. Sonic sensor in Ground Mode 2. Slope sensor, right side of the screed |
Press the F2 key again to activate Stringline Mode on the left side of the screed. |
| Submenu | |
|
Keys on the submenu: - Niveltronic Plus: F3 key (left and right side of the screed) - Niveltronic Basic: No submenu |
|
 |
|
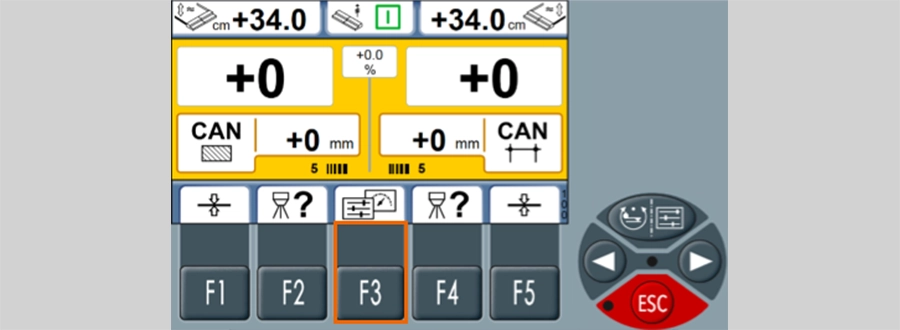
| Main menu: Press the F3 key to open the submenu. | |
 |
|
|
Submenu: 1. Calibration 2. Sensitivity 3. Working window / Control side 4. Brightness. Apart from brightness, settings can be made on both external control panels for both sides of the screed. |
|
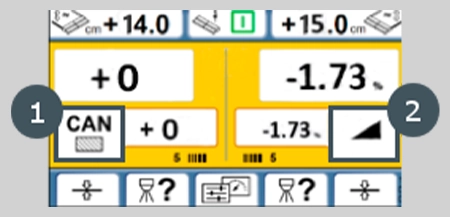
| Working Window | |
| Opening the Working Window | |
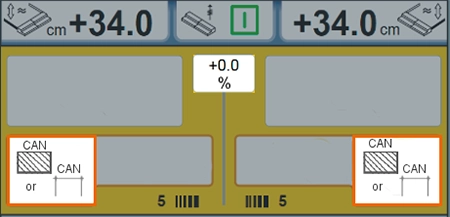
| NUMBER OF EXTERNAL CONTROL UNITS | |
| Press the F2 key to lock the operation of Niveltronic Plus from the other external control panel. The function can be switched on and off from both sides. The setting is retained until changed again. | |
 |
 |
| If one external control panel is displayed, then only the corresponding side can be operated. | If two external control panels are displayed, both grade and slope sensors can be operated. |
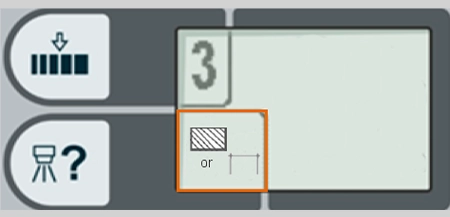
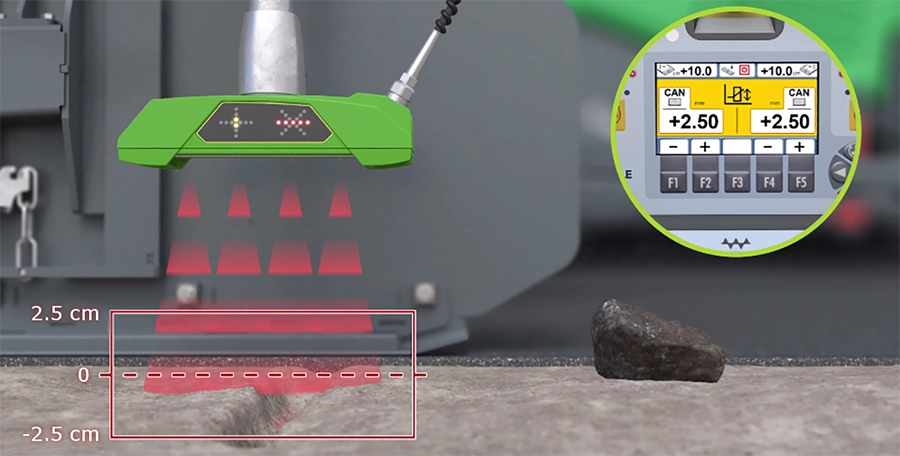
| ADJUSTING THE WORKING WINDOW | |
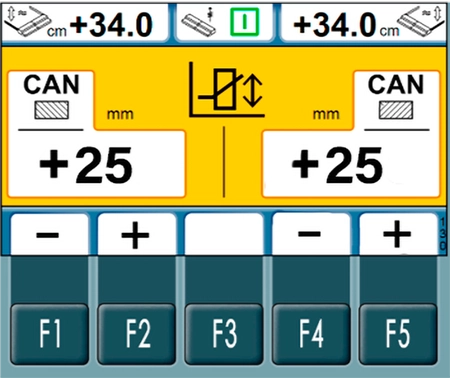 |
Here, you can press the F1/F2 keys for the left side and F4/F5 keys for the right side to adjust the working window for the Niveltronic grade sensors. |
 |
|
|
Factory default setting: 5 cm (corresponds to a working window of -2.5 cm and +2.5 cm) Function: In the event of a deviation within the set working window, the automatic grade and slope control is switched off until the paver has passed an obstacle (stone, shovel, depression, etc.) that has been overrun. Adjustment range: +5 mm to +99 mm |
|
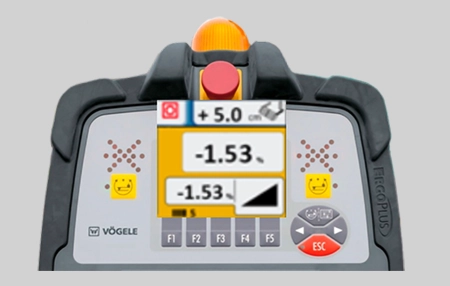
| Calibration | |
| Accessing Calibration | |
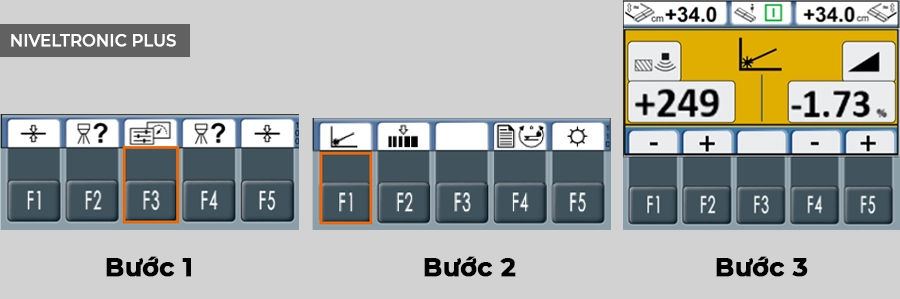 |
|
|
Step 1: Press the F3 key on the main menu. Step 2: Press the F1 key in the newly opened submenu. Step 3: The Calibration menu will open. |
|
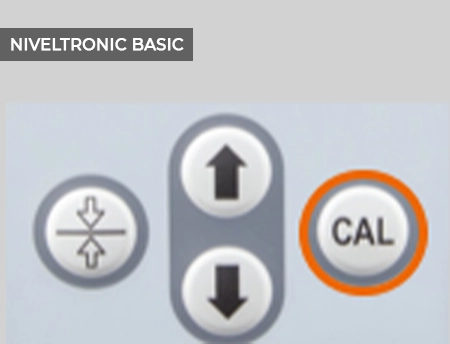 |
Press the CAL key to access the calibration function. |
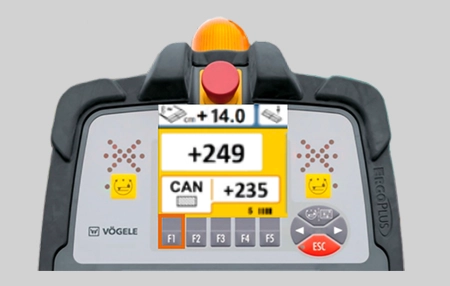
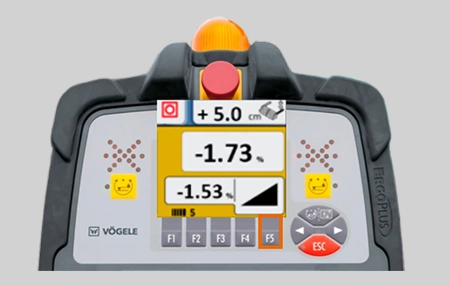
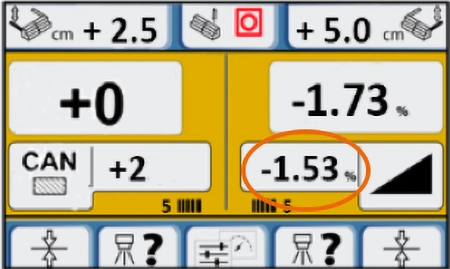 |
Example: Display while paving with grade on the left and slope on the right. Displayed value: 1.53% (actual) But the measurement of the paving result shows a different result. |
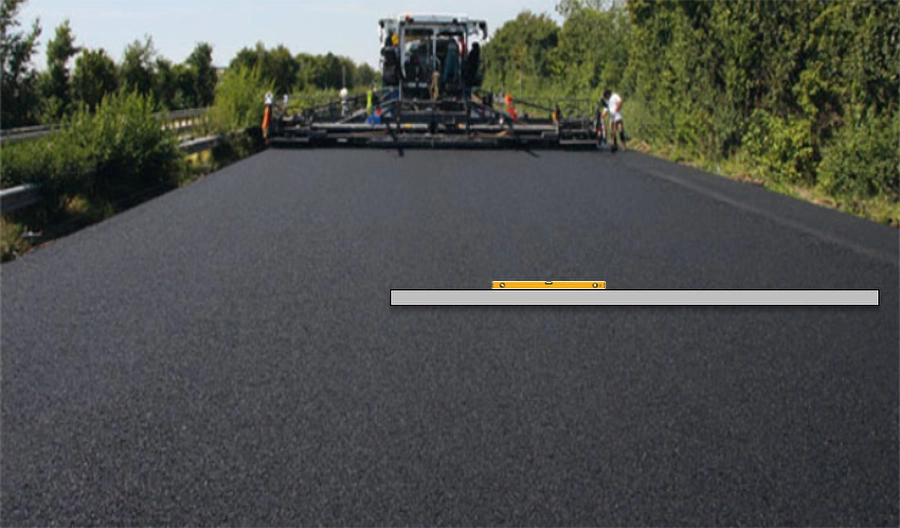
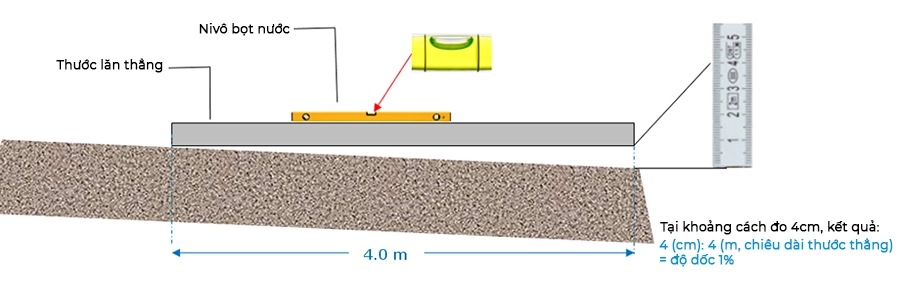
| Measure the transverse slope (example: similar measurement) | |
 |
|
 |
|
| You can also use a (calibrated) digital spirit level. | |
 |
|
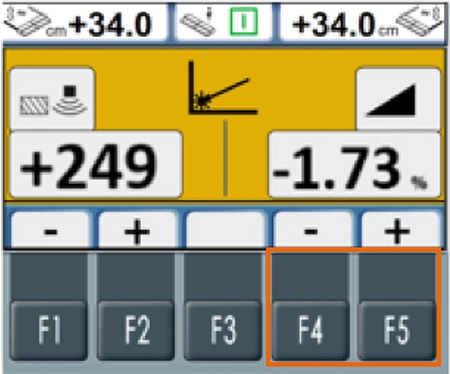 |
After accessing the Calibration screen, the actual value can be cross-checked and applied: Calibration is used to cross-check the displayed actual value against the value measured behind the screed. The display of the grade sensor can also be changed if necessary. The setting is retained until changed again. Changing the Actual Value Press the F1/F2/F4/F5 keys to adjust the displayed actual value. |
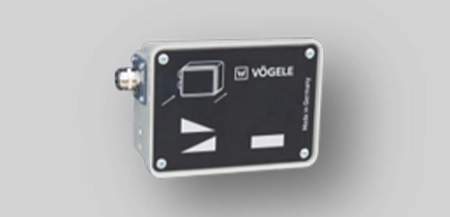
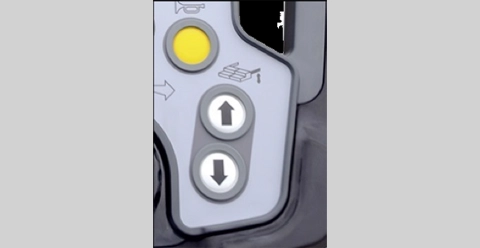
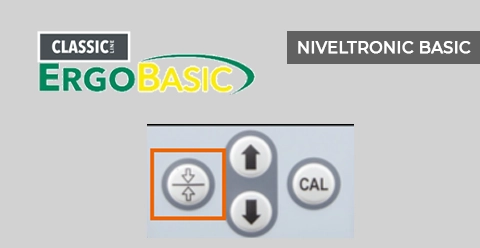
| Sensitivity | |
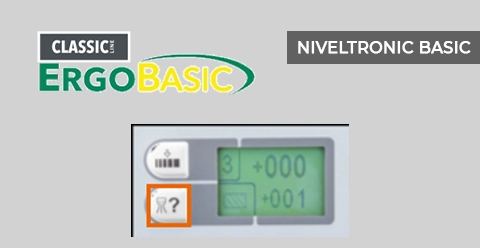
| Opening the Sensitivity Screen | |
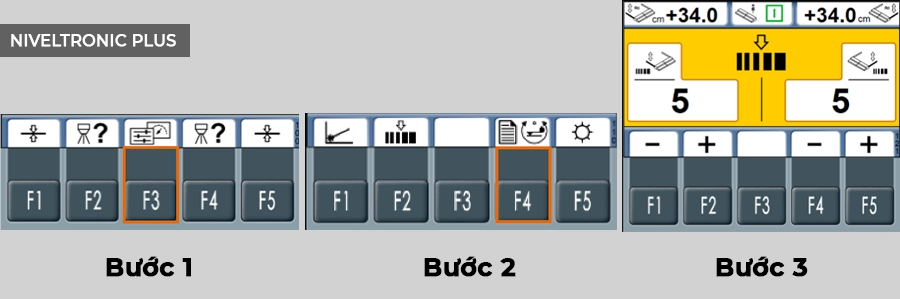 |
|
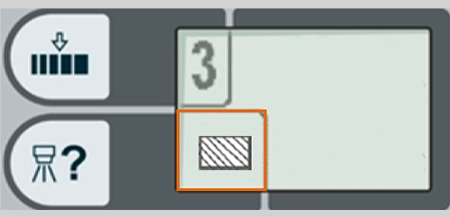
| To open the Sensitivity screen, press the marked key (Niveltronic Basic). |  |
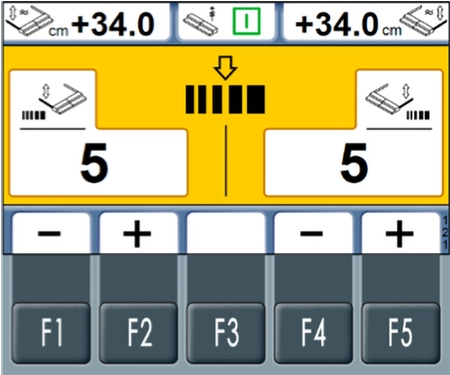 |
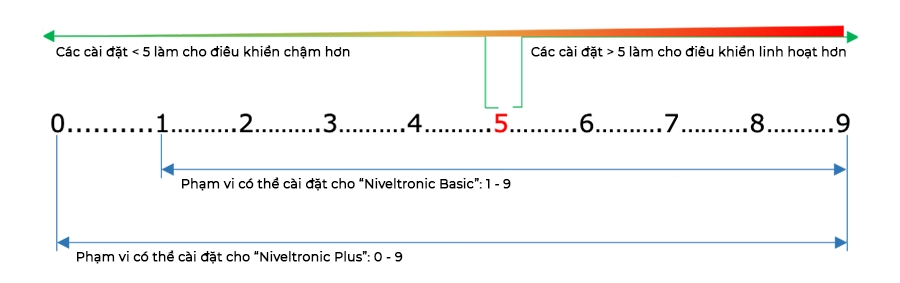
You can use the + and - keys on the display to set the sensitivity for the respective side of the screed. The setting is retained until changed again. Use the F1/F2 keys to set the grade and slope control on the left side. Use the F4/F5 keys to set the grade and slope control on the right side. Meaning of the Sensitivity Values: - Factory default setting = 5 - Niveltronic 'slow' = 0 - Niveltronic 'responsive' = 9 |
 |
|
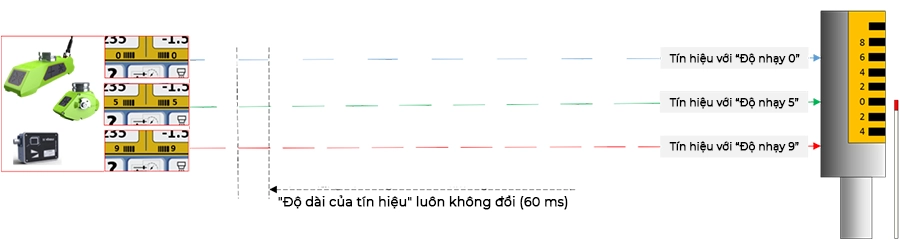
| Biểu đồ đơn giản của các tín hiệu từ cảm biến đến ty nâng hạ bàn đầm | |
 |
|
|
The control response of the screed raising/lowering cylinders is influenced by adjusting the pause intervals between signals. The longer the pause (sensitivity setting < 5) between the signals from the sensor, the slower the cylinder adjusts: - Slower response: Causes the cylinder to move less, resulting in a smoother surface. For example, with a relatively uneven reference. - Faster response: With a sensitivity setting > 5, the response is more responsive, causing the cylinder to move more, creating ideal conditions for copying the reference. For example, speed bumps, curb ramps. |
|
| Brightness | |
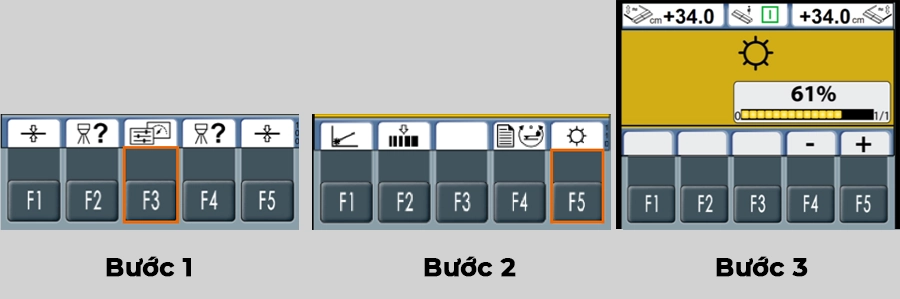 |
|
|
Step 1: Press the F3 key on the main menu. Step 2: Press the F5 key in the newly opened submenu. Step 3: Use the + / - keys to adjust the brightness to the operator's needs. |
|
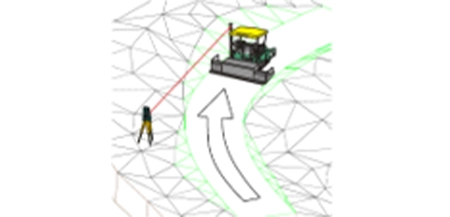
VOGELE SENSOR INTRODUCTION AND TUTORIAL VIDEOS
Videos about the Big Multiplex Ski sensor:
Design
Setup
Function
Paving
Slope sensor
Design
Paving
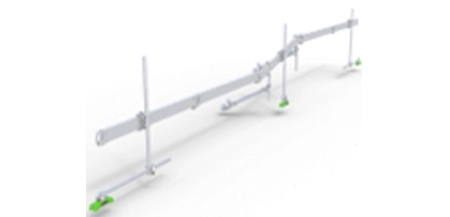
Variable mechanical grade sensor
Design
Joint Mode
Egde Mode
Gutter Mode
Stringline Mode
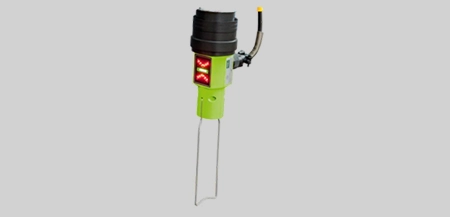
Multi-cell sonic sensor
Design
Joint Mode
Function
Egde Mode
Gutter Mode
Stringline Mode
